基礎教程
本教程將通過編寫一個簡單的擴充套件來說明編寫ClipCC擴充套件的基本流程。
準備工作
- 你需要一臺狀態良好的電腦,為了您的裝置安全,請不要使用手機,空調,遙控器等裝置開發
- 你需要安裝 Node.js 和 npm (安裝 Node.js 的時候應該已經自帶了),當然你也可以使用 Yarn
- 用於編寫程式碼的編輯器,我們推薦 VSCode,請切記不要使用記事本編寫程式碼!
建立新專案
npm -g install clipcc-extension-cli # 如果你使用Yarn 請替換為yarn global add clipcc-extension-cli
mkdir example-extension # 將example-extension替換為你的擴充套件名稱(必須要是英文!)
cd example-extension
npm init # 如果你使用Yarn 請替換為yarn init
ccext-cli
在最後一步中,ccext-cli會詢問有關擴充套件資訊的問題。我們將使用JavaScript(CommonJS)進行開發,所以請選擇JavaScript作為你的程式語言。雖然我更喜歡TypeScript
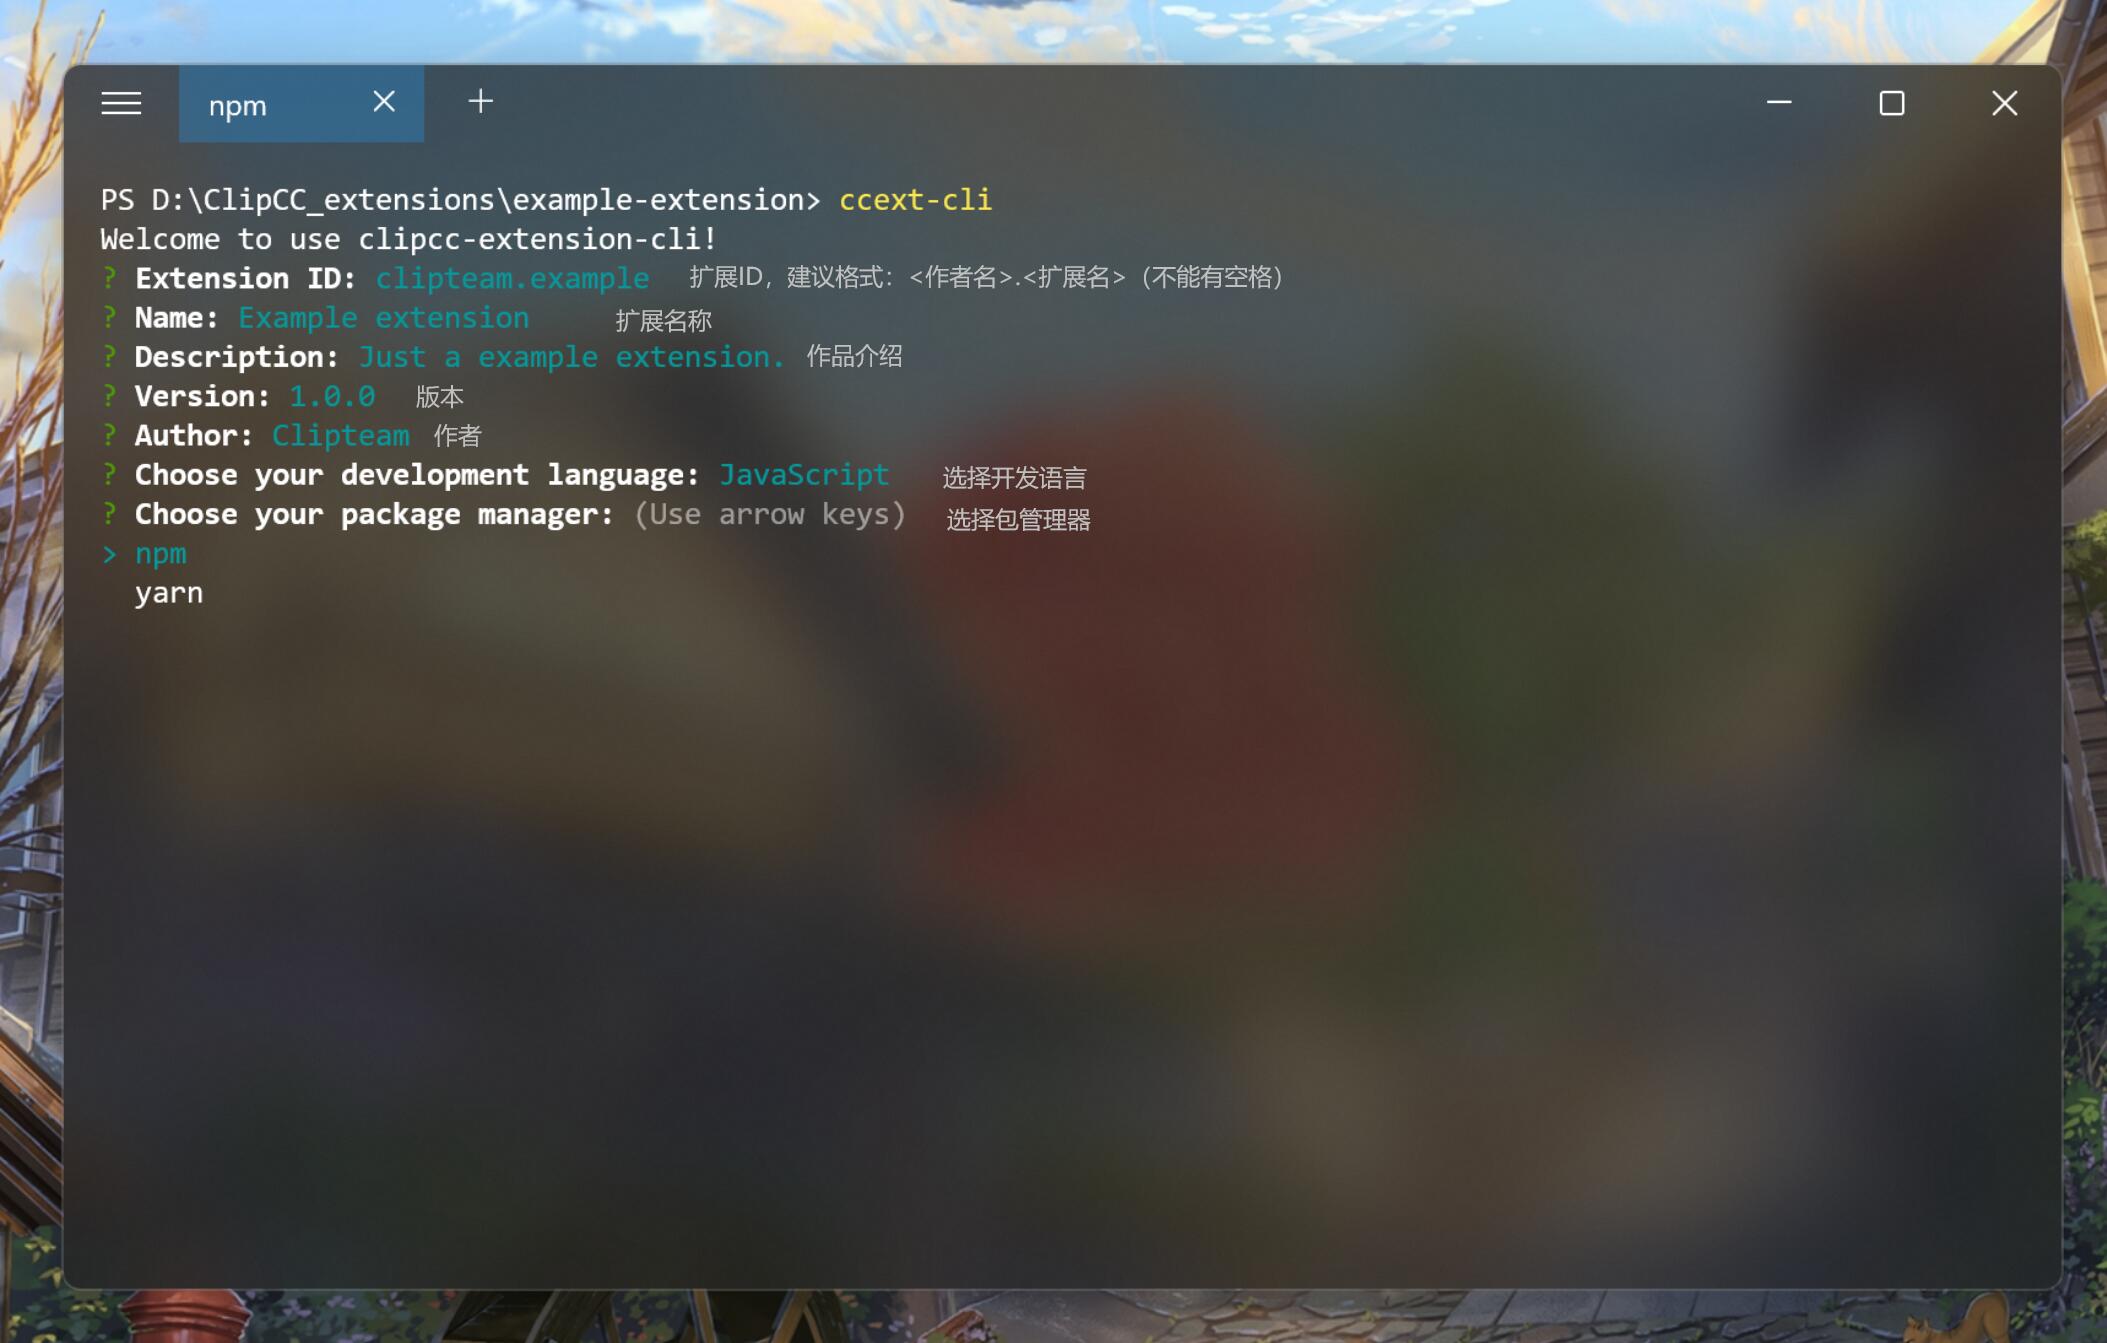
回答問題后,ccext-cli將自動安裝必要的程式,並自動產生一個空的ClipCC擴充套件專案
編寫擴充套件
你的擴充套件目錄應該看起來像這樣
assets/
- icon.jpg
- inset_icon.svg
locales/
- en.json
index.js
info.json
package.json
webpack.config.js
locales 目錄用於存放不同語言的翻譯文字,assets 用於存放外掛資源,index.js 是註冊模組/實現功能的主檔案,info.json 是外掛資訊
讓我們先打開 index.js 並填入以下內容
index.js
const {api, type, extension} = require('clipcc-extension');
class ExampleExtension extends Extension {
    onInit() {
        api.addCategory({
            // 替換為<你的擴充套件id>.category 下同
            categoryId: 'clipteam.example.category',
            messageId: 'clipteam.example.category',
            color: '#339900'
        });
        api.addBlock({
            opcode: 'clipteam.example.return',
            type: type.BlockType.REPORTER,
            messageId: 'clipteam.example.return',
            categoryId: 'clipteam.example.category',
            param: {
                VALUE: {
                    type: type.ParameterType.STRING,
                    default: 'Hello World!'
                }
            },
            function: args => this.ReturnValue(args.VALUE)
        });
        api.addBlock({
            opcode: 'clipteam.example.helloworld',
            type: type.BlockType.COMMAND,
            messageId: 'clipteam.example.helloworld',
            categoryId: 'clipteam.example.category',
            function: args => this.HelloWorld()
        });
    }
    onUninit() {
        api.removeCategory('clipteam.example.category');
    }
    ReturnValue(VALUE) {
        return VALUE;
    }
    HelloWorld() {
        console.log("Hello World!");
        alert("Hello World!");
    }
}
module.exports = ExampleExtension;
注意
返回值只能是 String、Number 或 Boolean 返回其他型態可能導致作品載入失敗
然後打開 locales/en.json 貼上以下內容
locales/en.json
{
    "clipteam.example.name": "Example",
    "clipteam.example.category": "Example",
    "clipteam.example.description": "ClipCC example extension",
    "clipteam.example.return": "return [VALUE]",
    "clipteam.example.helloworld": "Hello World!"
}
編寫完成後,在專案根目錄下執行 npm run build (或 yarn build)。產生的外掛(.ccx檔案)可以在 dist/ 目錄下找到,然後你就可以將產生的外掛匯入到ClipCC內了。
